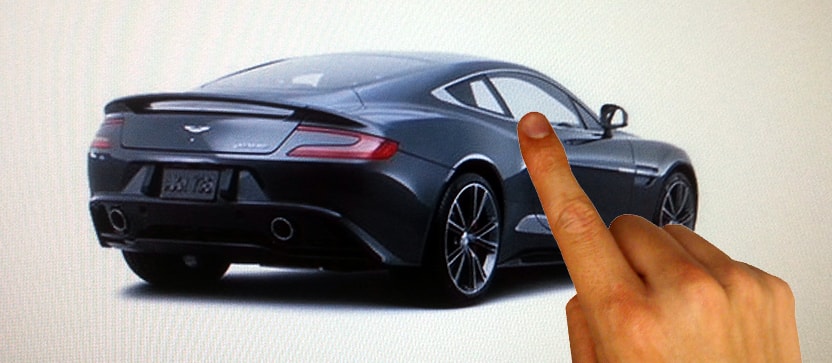
In this post I will show you how to create a 360 degree viewer that spins the subject on click-and-drag or on swipe. In this case the subject is a series of images that are shown one at a time based on the horizontal position of your mouse or finger.
Before we get started you’ll need a series of images of a subject. In this case I have 36 JPG images of a car. In each image the car is rotated by 10 degrees from the previous image. To make it easier for coding and automation you should name all your image files with the same base name and add a numeric suffix. In my case I have “car_(1).jpg, car_(2).jpg, car_(3).jpg…”.
The HTML
<div class="container">
    <div class="img-container">
        <div class="img360">
            <img id="myImg" src="images/car_slides/car_(1).jpg" />
        </div>
    </div>
    <div class="caption">
        ← Swipe → or Click and Drag to rotate
    </div>
    <div id="preload-imgs"></div>
</div>
The CSS
.container {
    width: 100%;
    height: 100%;
    max-width: 726px;
    min-width: 320px;
    margin: 0 auto;
}

.img-container {
    border: 1px solid #ccc;
    width: 100%;
    max-width:640px;
    margin: 0 auto;
    padding:0;
    cursor: ew-resize;
}

.img360 {
    width: 100%;
    margin: 0;
    padding: 0;
    line-height: 0;
}

img {
    width: 100%;
    margin: 0;
    padding: 0;
}

#preload-imgs {
    display:none;
}
The Javascript
You’ll need to include two js files: jQuery and TouchSwipe:
<script type="text/javascript" src="http://ajax.googleapis.com/ajax/libs/jquery/1.8.2/jquery.min.js"></script>
<script type='text/javascript' src='js/jquery.touchSwipe.min.js'></script>
$(function() {

var num = 36; // the total number of images

// Preload all the images into hidden div
for (var i=1 ; i<=num ; i++) {
    var img = document.createElement('img');
    img.src = 'images/car_slides/car_('+i+').jpg';
    document.getElementById('preload-imgs').appendChild(img);
}

// Control swipes using jquery.touchSwipe.min.js
// http://labs.rampinteractive.co.uk/touchSwipe/
var swipeOptions=
{
    triggerOnTouchEnd : true,
    swipeStatus : swipeStatus,
    allowPageScroll:"vertical",
    threshold:75
}

$(function()
{
    imgs = $(".img-container"); // the element that will be swipeable
    imgs.swipe( swipeOptions );
});

function swipeStatus(event, phase, direction, distance) {
    var duration = 0;
    if(direction == "left") {
    	changeImg(distance);
    }
    else if (direction == "right") {
    	changeImgR(-distance);
    }
}

function changeImg (imgNum) {

    // divide by 8 (or any number) to spread
    // it out so it doesn't load new img
    // every single px of swipe distance
    imgNum = Math.floor(imgNum/8);

    if (imgNum < 1) {
    	imgNum += num;
    }
    if (imgNum > num) {
    	imgNum -= num;
    }

    // change the image src
    document.getElementById("myImg").src="images/car_slides/car_("+imgNum+").jpg";
}

function changeImgR (imgNum) {

    // divide by 8 (or any number) to spread
    // it out so it doesn't load new img
    // every single px of swipe distance
    imgNum = Math.floor(imgNum/8);

    var num2 = -Math.abs(num);
    if (imgNum > num2) {
    	imgNum += num;
    }
    if (imgNum <= num2) {
    	imgNum += num*2;
    }

    // change the image src
    document.getElementById("myImg").src="images/car_slides/car_("+imgNum+").jpg";
}
})
Breaking down the javascript
1. Specify the number if images
The first thing to do is specify the total number of images you have with: var num = 36;
2. preload the images
Since we used our numeric naming convention ("car_(1).jpg, car_(2).jpg...) we can simply load all the images into a hidden div using a for loop
for (var i=1 ; i<=num ; i++) {
    var img = document.createElement('img');
    img.src = 'images/car_slides/car_('+i+').jpg';
    document.getElementById('preload-imgs').appendChild(img);
}
3. Handle swipes with TouchSwipe
The next section utilizes the extremely helpful TouchSwipe js that can be found at http://labs.rampinteractive.co.uk/touchSwipe/. This script makes is much easier to detect a swipe start and keep track of direction, duration and distance of the swipe.
Here I'm saying to use the .img-container div as the area to monitor touch and mouse events.
$(function()
{
    imgs = $(".img-container"); // the element that will be swipeable
    imgs.swipe( swipeOptions );
});
Here I'm using distance and direction of the swipe to determine when to change the src of the img.
function swipeStatus(event, phase, direction, distance) {
    var duration = 0;
    if(direction == "left") {
    	changeImg(distance);
    }
    else if (direction == "right") {
    	changeImgR(-distance);
    }
}

function changeImg (imgNum) {

    imgNum = Math.floor(imgNum/8);

    if (imgNum < 1) {
    	imgNum += num;
    }
    if (imgNum > num) {
    	imgNum -= num;
    }

    // change the image src
    document.getElementById("myImg").src="images/car_slides/car_("+imgNum+").jpg";
}
And that's pretty much it. Check out the demo and view it's source for the full picture.
When I originally started working on this I planned to use one big sprite sheet instead of 36 separate JPGs and simply use js to change the bg position of the sprite. But I failed to get it to work and be responsive. I'm sure it's possible. So maybe someday I'll give it a go.